![]()
Treating Symptoms with Silicone Instead Of Fixing the Causes
A bead of silicone over a visible gap feels satisfying—but moisture rarely travels in a straight line. Water takes hidden paths through capillaries in render, behind tiles, and along poorly terminated flashings. The result is a recurring stain or musty smell a few weeks after the “repair.” The fix: start with targeted leak detection (moisture mapping, thermal imaging, controlled hose tests) to identify where water enters and how it travels. Once the path is proven, design a scope that corrects the root cause—reforming balcony falls, reinstating membranes, replacing failed flashings—rather than smearing sealant over the evidence.
Ignoring Hairline Cracks in Concrete
Hairline cracks look harmless, but Brisbane’s intense sun and heavy downpours drive cyclic expansion/contraction that slowly pumps water and contaminants into the slab. Left alone, micro-cracks can widen, corrode reinforcement, and telegraph as internal damp or spalling. The fix is professional concrete crack injection using low-viscosity resins (epoxy for structural stitching, polyurethane for flexible, water-tracking cracks). The key is surface prep and injection under controlled pressure so the resin fills the entire fissure, not just the first few millimetres. For movement-prone joints, add a compatible surface seal or re-detail a control joint to accommodate seasonal movement.
Re-Tiling Over a Failed Balcony Membrane
It’s common to rip up drummy tiles, patch the screed, and relay new tiles—without addressing the compromised membrane beneath. This traps moisture, recreates ponding, and guarantees a repeat failure. Durable balcony waterproofing involves resetting the fundamentals: correcting falls (e.g., 1:80 toward drains), replacing or reinstating puddle flanges, applying a compatible sheet or liquid membrane to the correct thickness, and ensuring that upturns and terminations meet modern standards under door thresholds and behind cladding. Only then should tiles, adhesives, and grouts go back, selected from a single system for warranty integrity.
Using The Wrong Products for Brisbane’s UV and Rainfall Patterns
Hardware-store sealants and thin, interior-grade membranes often degrade quickly in Queensland’s high-UV environment. When exposed membranes chalk, craze, or form a pinhole, wind-driven rain finds an easy entry. The fix is to specify UV-stable elastomeric, two-part polyurethanes, or modern hybrid systems rated for exterior use—and to match primers, membranes, and adhesives from one system family. On roofs, choose a roof membrane with proven UV resistance and consider cool-roof topcoats to reduce thermal stress. Indoors, select wet-area membranes compatible with your tile adhesive and grout so chemistry doesn’t undermine performance.
Skipping Substrate Preparation
Waterproofing fails are often 70% preparation, 30% product. Dusty screeds, laitance on concrete, residual soap scum in showers, or old adhesive ridges prevent proper bonding. Grinding, vacuuming, crack chasing, patching, and priming feel slow, but they’re non-negotiable. If you’re repairing a balcony, check for hollow screed, re-form falls where ponding occurs, and ensure drains are at the lowest point. In showers, remove contaminated grout and silicone, repair the substrate, and only then re-membrane and re-tile. Good prep is invisible in the finished room—but it’s the difference between a fix that lasts five months and one that lasts five years.
Chasing Leaks from the Wrong Side
Negative-side coatings (applied to the inside of a wall) can sometimes slow down damp, but they rarely solve the cause. If water is entering from outside—through a balcony, parapet, or façade joint—blocking it from the inside is a stopgap at best. The fix is to waterproof from the positive side: keep rain out at the source with correct membranes, flashings, and sealant systems, and reserve negative-side tanking for carefully chosen scenarios (e.g., some basements) where positive-side access is genuinely impossible.
Forgetting Movement and Joint Design
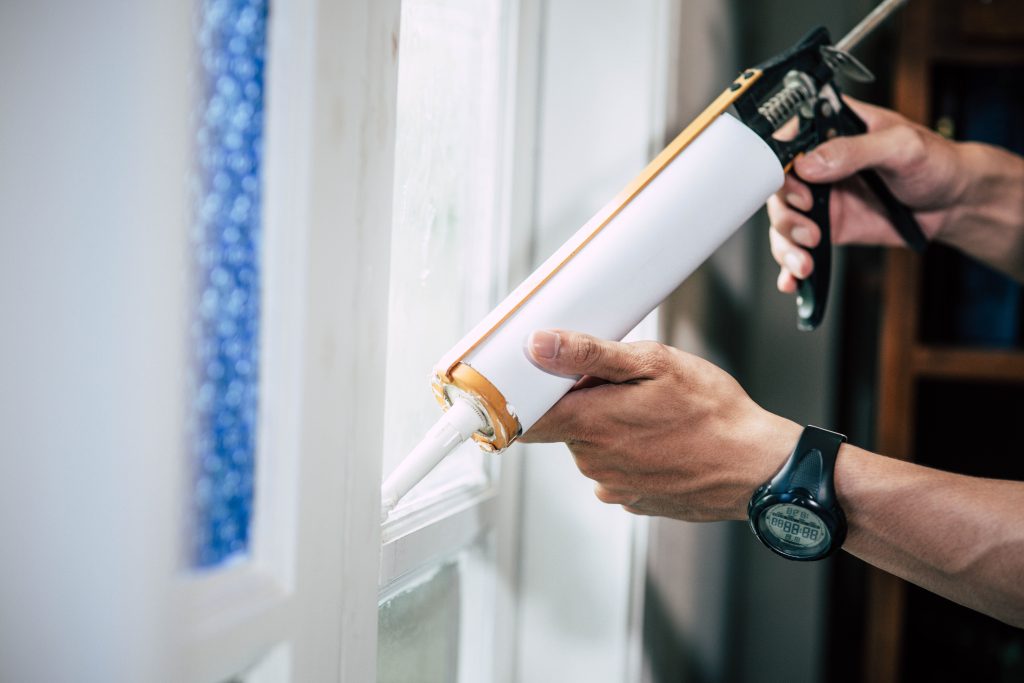
Buildings move—thermal expansion, settlement, and wind loads all shift substrates. Rigid repairs across movement joints crack; mismatched sealant hardness tears away; tiles shear at poorly detailed thresholds. The fix is joint literacy: use backer rods and elastomeric sealants with the correct movement class, reinstate control joints through tile finishes, and add slip-joints at door thresholds. Around windows and façades, a professional reseal with UV-stable silicone or hybrid polymers—and correctly sized joints—prevents wind-driven rain from bypassing the neatest paint job.
DIYing Where Asbestos May Be Present
Many pre-1990s Brisbane homes contain legacy ACMs (asbestos-containing materials) in eaves, soffits, old waterproofing layers, and some backer boards. Disturbing them during patch-ups is dangerous and tightly regulated. The fix is to assess before you cut, grind, or sand. If asbestos is confirmed, involve a licensed asbestos removal service for removal or, where appropriate, compliant encapsulation. Encapsulation uses approved coatings and methods to lock fibres in place until staged removal is practical. Either way, you avoid health risks, regulatory breaches, and the cost of redoing non-compliant work.
Re-coating Roofs With-Out Fixing Penetrations and Drainage
Owners often apply a new roof membrane over chalky old coatings, brittle sealant, and blocked scuppers. The first storm pools water under the new film and pushes it through the same weak points. The fix: properly prepare the roof—clean the sound substrate, replace or re-flash penetrations (vents, solar brackets, antennas), re-bed cracked capping, and clear overflows. Only then apply the specified membrane system to the correct film thickness and re-topcoat to manage UV and heat.
No Flood Test, No Proof
Skipping flood tests (where appropriate) to “save time” often guarantees rework. Without a controlled test, you don’t know if the upturns, penetrations, and drains actually perform as intended. The fix is procedural discipline: flood-test showers and balconies after membrane cure; hose-test façades methodically; record results with photos and moisture readings. This isn’t bureaucracy—it’s your assurance that failures won’t hide.
Mixing Brands and Voiding Warranties
A membrane from Brand A, primer from Brand B, and tile adhesive from Brand C is a recipe for finger-pointing if something fails. The fix is system thinking: choose a single, compatible suite—primer, membrane, adhesive, grout, silicone—so installation follows a coherent spec and warranty responsibilities are clear.
Leaving Gutters, Downpipes, and Overflows to “Later”
Blocked gutters and undersized overflows force water to back up under flashings and into cavities. Even the best membrane can’t cope if drainage is overwhelmed. The fix is maintenance choreography: schedule seasonal cleaning, check that overflows exceed inflows at peak rainfall, and ensure balcony scuppers aren’t half-buried under tiling build-ups or debris.
Underestimating the Cost of Inaction
Owners sometimes “wait and see” because the leak seems minor. But the hidden damage—swollen skirting, mould in wall cavities, delaminating flooring, rusting fixings—compounds quickly in Brisbane’s humidity. Act now, and you’re buying certainty and avoiding secondary trades (cabinetry, flooring, plastering) later. Insurers frequently limit cover for gradual ingress and maintenance neglect; a prompt, documented repair protects both your home and your claim prospects.
How to Avoid All of the Above (A Simple Action Plan)
1) Diagnose before you demo. Book professional leak detection—moisture mapping, thermal scans, and, where needed, controlled water tests—to prove the ingress path.
2) Get a cause-based scope. Demand a written plan that addresses falls, membranes, flashings, and joint design—not just “apply sealant.”
3) Choose climate-ready systems. For exteriors, choose UV-stable membranes and sealants; for interiors, use wet-area systems from a single brand family.
4) Prepare like a pro. Grind, clean, prime, and repair cracks; replace damaged screed; clear drains and overflows before membranes go down.
5) Respect movement. Reinstate control joints, size façade joints correctly, and use backer rod + elastomeric sealant with the right movement class.
6) Prove performance. Flood-test and document; hose-test façades; keep photos and readings.
7) Manage risk materials. If your home predates modern standards or you suspect legacy products, engage a licensed asbestos removal service or discuss compliant encapsulation.
8) Maintain drainage. Keep gutters, downpipes, and scuppers clear; verify overflow capacity; add guards where debris is a constant issue.
When to Call In Specialists (And Who)
If you’re seeing recurring stains, musty rooms, or balcony ponding, it’s beyond DIY. You need a contractor who treats waterproofing as building science, not cosmetics—someone who can combine concrete crack injection, balcony remediation, façade reseals, and roof-membrane work under one coherent plan. That coordination reduces trade clashes, compresses timelines, and delivers a repair you can trust through Brisbane’s wet months and scorching summers.
The Bottom line
Water finds weaknesses; good practice removes them. Diagnose first, fix causes (not symptoms), choose systems that can survive Queensland’s climate, and prove performance before you cover anything up. If you want an expert team that does all of this—start to finish—talk to Waterproof Co. They deliver root-cause scopes, climate-ready systems, and documented results that keep water where it belongs: outside.